

前言
前面已经介绍了如何使用djangoCMS来搭建一个博客系统,具体效果可参考www.codingsoho.com, 但是最近使用的时候碰到一个问题就是如果某个专题的文章很多的话,仅仅靠分类功能并不能满足,所以打算来加一个简单的专题功能。 创建专题功能应用
首先跟普通的工程一样我们先实现一个专题应用,然后下一步再把它集成到djangoCMS中去。
创建应用
创建应用serials
python manage.py startapp serials
创建module
创建module文件,我们需要两个model: serial和entry
serial代表专题连载,entry是专题里的各篇文章,这个文章对应于我们要呈现的blog,当然也包含了一些其他用于专题显示的字段。具体内容如下
class Serial(models.Model):
    title = models.CharField(_('title'), max_length=150, blank=False, null=False)
    abstract = models.TextField(_('abstract'), max_length=500, blank=True, null=True)
    image = models.ImageField(_('image'), upload_to="upload/serial/", blank=True, null=True)
    order = models.IntegerField(_("order"), blank=True, null=True, default=-1)
    active = models.BooleanField(_("active"), default=False)
    timestamp = models.DateTimeField(auto_now_add=True, auto_now=False)
    updated = models.DateTimeField(auto_now_add=False, auto_now=True)
    def __unicode__(self):
        return self.title
    def get_absolute_url(self):
        return reverse("serial_detail", kwargs={"pk":self.pk})
    class Meta:
        verbose_name = _("Serial")
        verbose_name_plural = _("Serial")
        ordering = ['order', '-updated']
简单介绍一下这几个字段
- title – 专题的标题
- abstract – 专题摘要, 这是对专题的一些概况性描述
- image – 跟专题相关的图片,用于显示
- order – 用于排序
- active – 控制是否显示,前端只显示处于激活状态下的连载内容
- timestamp – 创建时间,该字段默认更新
- updated – 更新时间,该字段自动赋值
Meta里的ordering设置为['order', '-updated'],这样就能按照我们指定的顺序显示
class Entry(models.Model):
    serial = models.ForeignKey(Serial, verbose_name = _("serial"), blank=False, null=False)
    title = models.CharField(_('title'), max_length=150, blank=False, null=False)
    url = models.URLField(_('url'), max_length=100, blank=False, null=False)
    image = models.ImageField(_('image'), upload_to="upload/serial/", blank=True, null=True)
    order = models.IntegerField(_("order"), blank=True, null=True, default=-1)
    active = models.BooleanField(_("active"), default=False)
    timestamp = models.DateTimeField(auto_now_add=True, auto_now=False)
    updated = models.DateTimeField(auto_now_add=False, auto_now=True)
entry model里,对url这个字段简单介绍一下,这个就是对应的博客的链接,不是相对路径。这个跟评论的关联有点类似,当然将来这种专题可以扩展到不仅仅针对博客,也可以针对视频或者其他内容
执行makemigrations和migrate生成数据表
实现专题列表视图
我们需要实现两个视图,显示所有专题的视图以及访问某个专题时的对应显示。Django强大的class-based-view模块提供了实现该功能的基本方法
首先列表视图,导入django.views.generic.list里的ListView,这儿我只写了一个最简单的实现,指定queryset和模板名字。
在queryset里,针对对象做了过滤,只提取了active的对象,便于后面对内容发布进行控制。
模板存放位置在template_name里指定,如果你用系统指定的路径和名字,该变量可以不赋值。
from .models import *
from django.views.generic.list import ListView
class SerialListView(ListView):
    queryset = Serial.objects.filter(active=True)
    template_name = "serials_list.html"
添加文件template/serias_list.html
{% extends "serials_base.html" %}
{% load i18n %}

{% block content %}

        {% for obj in object_list %}
            {% include "serial_list_content.html" with object=obj show_entry_list=False %}
            <div class="row" style="padding-top: 20px;">
                <div class="col-sm-12">
                    <div class="text-center"><a href="{{obj.get_absolute_url}}" class="btn btn-primary btn-lg">{% trans "View Serial" %}</a></div>
                </div>
            </div>

            <br>
            <br>
            {% if not forloop.last %}
            <hr>
            {% endif %}

        {% endfor %}
{% endblock %}
内容显示放在了模板文件serial_list_content.html里,因为后面显示详情了还会用到
    <div class="row">
        <div class="col-sm-6 push-sm-6">
            <img src="{{object.image.url}}" class="img-fluid">
        </div>
        <div class="col-sm-6 pull-sm-6">
            <h1 class="serial-headline">
                <a href="{{object.get_absolute_url}}"><small><b>{{object.title}}</b></small></a>
            </h1>
            <p class="lead">
                {{object.abstract}}
            </p>
        </div>
    </div>
给这个视图添加URL
创建serials/urls.py
from .views import (
    SerialListView,
)

urlpatterns = [
    url(r'^$', SerialListView.as_view(), name='serial_list'),
]
更新项目urls.py
urlpatterns += i18n_patterns(
    url(r'^course/', include('serials.urls')),
    url(r'^', include('cms.urls')),
)
注意:把course对应的URL一定要放在cms.url前面,否则cms会处理所有前面没处理的模式pattern。
添加专题内容
内容添加在后台完成,添加下面的代码来支持serial和entry的添加。
from .models import Serial, Entry

class EntryInline(admin.TabularInline):
    model = Entry
    extra = 1
    max_num = 50

class SerialAdmin(admin.ModelAdmin):
    inlines = [
        EntryInline,
    ]

class EntryAdmin(admin.ModelAdmin):
    pass

admin.site.register(Serial, SerialAdmin)
admin.site.register(Entry, EntryAdmin)
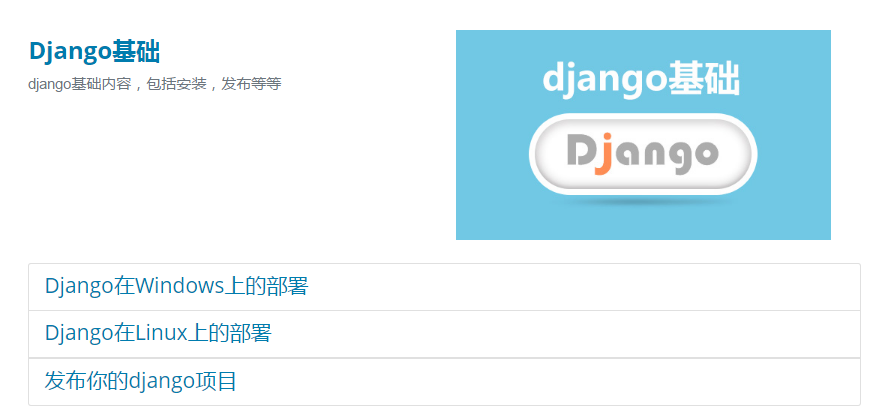
在admin添加对应的serial和entry。
这个时访问http://127.0.0.1:8000/zh/course/,就可以看到如下的效果

实现专题详情视图
上面列出了所有的专题内容,点开某个专题时应该会列出该专题所有的博客文章,接下来我们来实现它
在views.py添加
from django.views.generic.detail import DetailView

class SerialDetailView(DetailView):
    queryset = Serial.objects.all()
    template_name = "serials_detail.html"

    def get_context_data(self, *args, **kwargs):
        context = super(SerialDetailView, self).get_context_data(*args, **kwargs)
        context["object_list"] = Entry.objects.filter(serial__pk=self.get_object().pk, active=True)

        return context
实现模板serials_detail.html,
{% extends "serials_base.html" %}
{% block content %}
{% include "serial_list_content.html" with show_entry_list=True %}
{% endblock %}
详情视图里我们继续包含serial_list_content的内容,这部分和列表页是一样的,另外,我们还要添加entries列表,代码如下
    {% if show_entry_list %}
    <br>
    <div class="row">
        <div class="col-sm-10">
            <!-- <h2>{{obj}}</h2> -->
            <div class="clearfix"></div>
        </div>
        <div class="col-sm-2">
        </div>
    </div>
    <div class="list-group">
        {% for item in object.entry_set.all %}
        <a class="list-group-item justify-content-between {% if forloop.first %}first-lecture{% endif %} " href="{{item.url}}">
            <h3 class="mb-1">{{item.title}}</h3>
        </a>
        {% endfor %}
    </div>
    {% endif %}
添加对应的URL
from .views import (
    SerialDetailView,
)

urlpatterns = [
    url(r'^(?P<pk>\d+)', SerialDetailView.as_view(), name='serial_detail'),
]
访问http://127.0.0.1:8000/zh/course/1,效果如下
CMS插件集成应用
接下来进入到本文的重点,如何将上面的应用集成到djangoCMS里。
我是参考下面教程完成的
- http://docs.django-cms.org/en/latest/introduction/plugins.html#plugins
- tutorial -http://docs.django-cms.org/en/latest/introduction/integrating_applications.html
教程里额外建了个应用来处理插件,为了简化,我还是在原来的应用里完成了插件实现。
Plugin Model
在models.py里添加下面代码
from django.db import models
from cms.models import CMSPlugin
from serials.models import Serial

class SerialPluginModel(CMSPlugin):
    serial = models.ForeignKey(Serial)

    def __unicode__(self):
        return self.serial.title
注意:CMS plugin都是从CMSPlugin继承来的,不是从models.Model
Plugin Class
在models.py同级目录创建文件cms_plugin.py,这个plugin类负责向CMS提供相应的信息来渲染你的plugin
代码实现如下
from cms.plugin_base import CMSPluginBase
from cms.plugin_pool import plugin_pool
from .models import SerialPluginModel
from django.utils.translation import ugettext as _

@plugin_pool.register_plugin # register the plugin
class SerialPluginPublisher(CMSPluginBase):
    model = SerialPluginModel # model where plugin data are saved
    module = _("serials")
    name = _("Serial Plugin") # name of the plugin in the interface
    render_template = "plugin/serial_plugin.html"

    def render(self, context, instance, placeholder):
        context.update({'instance': instance})
        return context
注意:plugin类必须从CMSPluginBase继承,并且在plugin_pool注册
模板
需要在plugin类里对属性render_template进行赋值,plugin将用这个模板渲染
内容如下
{% include "serial_list_content.html" with show_entry_list=True object=instance.serial %}
这个就是前面我们前面详情视图的内容,只保留了内容部分。
集成应用
至此,该应用到CMS的集成已完成。如果你用额外的应用来实现plugin的话,还需要将它添加到settings.py里。
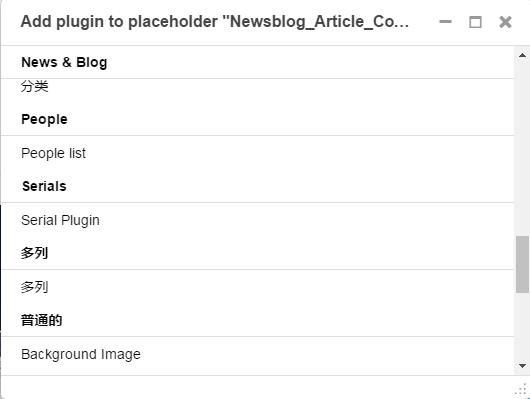
再次添加插件时,可以看到serial已经在其中了。
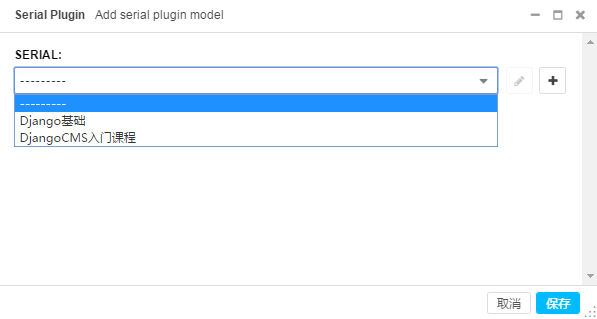
点击Serial Plugin,可以在下面页面中选到我们前面添加的专题内容。
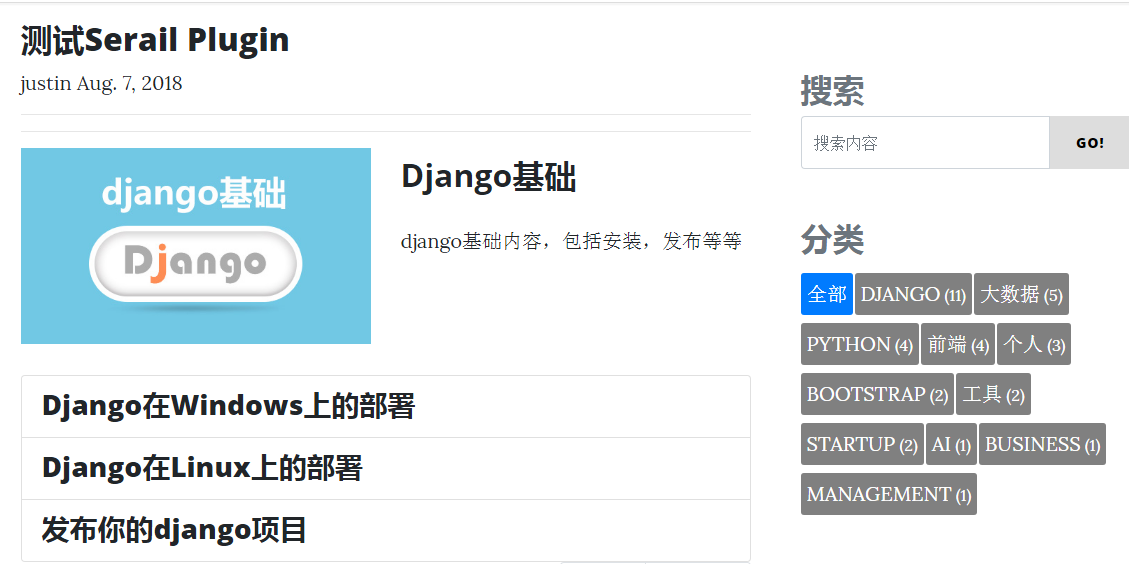
最终呈现效果

评论
留言请先登录或注册! 并在激活账号后留言!